Fitting our large door pulls is a simple process. These are the main considerations before picking up any power tools:
Tools Required:
Power Drill
Drill Bit (just larger than bolt through connection)
Phillips head Screw Driver
Counter Sunk Drill Bit (optional)
Step 1 - Placement of Door Pull Handle:
First, decide on the placement of your pull handle, for internal doors, we recommend going 2.5 - 3.5 inches (6.35cm to 8.89cm) away from the edge of the door, this allows your hands not to rub on the door jamb.
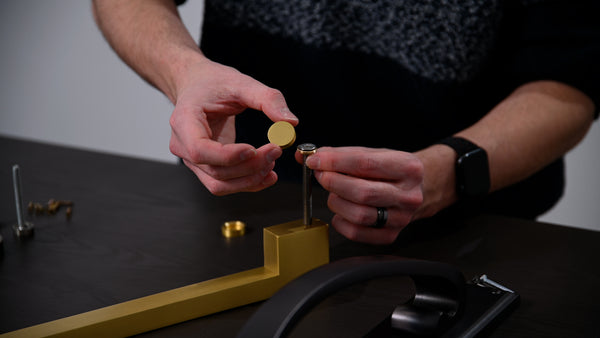
Step 2 - Attaching Door Pull Handle:
Next after placement, it's about understanding your fixings. Depending on your pull, they might be slightly different fixing methods. For the majority of our pull handles, we offer bolt-through connections, which means you must drill in from both sides to create a clean hole, feed the bolt through and attach it to the pull handle until it is tight.
The head of these bolts will need to be cut into the door to allow a flush fit.
However, some of our pull handles will be front fixings, using the provided screws, simply attach the pull handle with the matching screws, and ensure the pull handles with the backplate are level before attaching screws.

Step 3 - New Door Pull Handles:
You can now admire your work and enjoy your brand-new pull handle.

Comments




.png?v=1707144543698&options=c_fill,w_2260,h_1280)
.png?v=1707144555756&options=c_fill,w_750,h_700)


